
How to Care for Your Window Tint
How to Care for Your Window Tint: Maintenance Tips for Long-Lasting Protection
Why Proper Window Tint Care Matters
First Few Days After Tinting – What to Expect
Cleaning Tinted Windows the Right Way
Preventing Tint Damage – Everyday Tips to Keep Your Film Looking New
Long-Term Tint Maintenance – When to Clean, Inspect, and Re-Tint
Troubleshooting – What’s Normal vs. What’s Not
Why Professional Installation + Care Matter
Why Proper Window Tint Care Matters
So, you just had your windows tinted—whether it’s your car, home, or commercial space—and you’re loving the cooler feel, sleek look, and added privacy. But here’s the deal: even the best window tint won’t last forever without proper care. Just like paint on your vehicle or landscaping at your home, tint needs a little upkeep to keep it looking and performing like new.
At SRS Tint & Graphics, we’re not just here to install top-tier films—we’re here to help you protect your investment for the long haul. We’ve seen it all: bubbling from rolled-down windows too early, scratches from harsh cleaners, fading from years of sun exposure. The good news? These problems are 100% preventable with just a few simple habits.
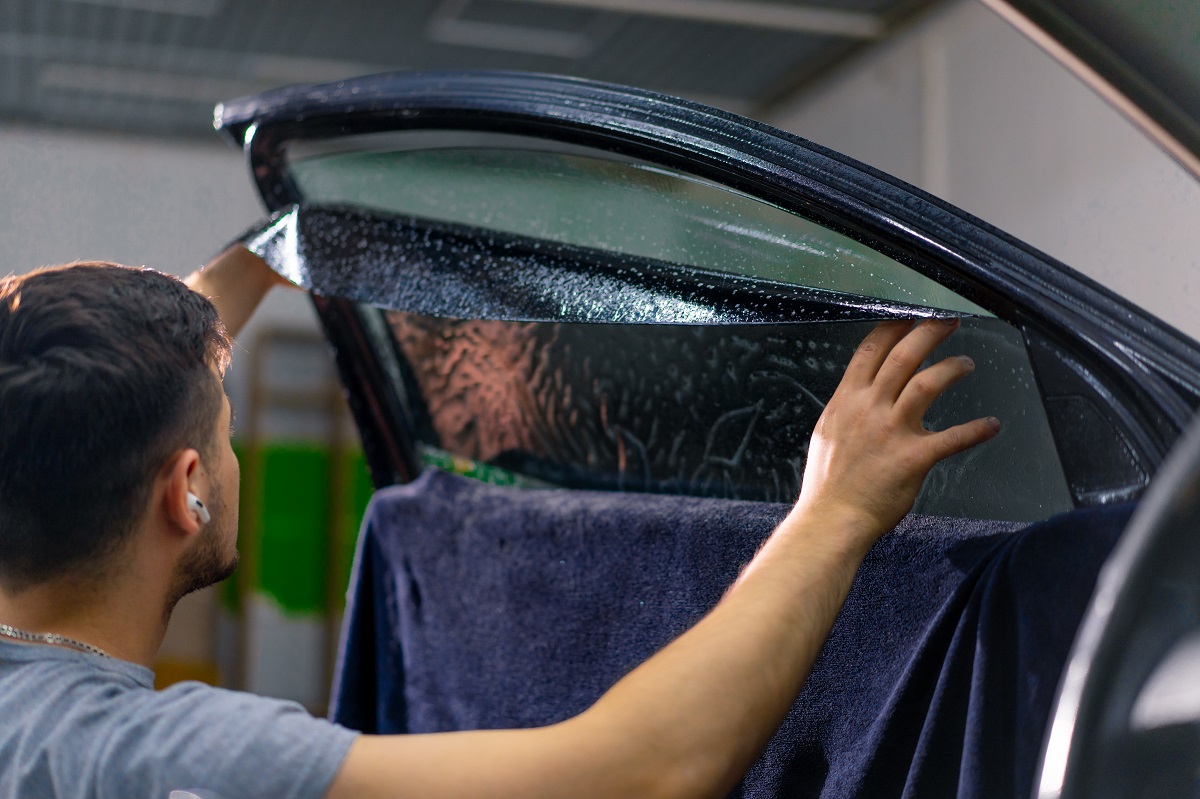
Why Maintenance Really Matters
Here’s what proper care does for you:
Keeps your tint looking flawless: No streaks, no scratches, no bubbling.
Preserves performance: Maintains heat rejection, UV protection, and privacy.
Extends tint life: Professional films are durable—but care ensures you’ll enjoy that quality for years.
Real-World Examples
Let’s say you’re an auto enthusiast who just got ceramic tint installed. It looks great and blocks heat like a champ—but if you hit the car wash with an ammonia-based cleaner or start scraping snow off with a blade, you could end up with scratches or discoloration fast.
Or maybe you’re a homeowner who tinted your windows to keep the living room cool and protect your hardwood floors. If your cleaner has alcohol or ammonia, it can cause the film to deteriorate, leaving you with patchy tint and faded interiors all over again.
Same goes for business owners: if your office tint bubbles because a cleaning crew used abrasive tools, it doesn’t just look bad—it affects energy efficiency, comfort, and first impressions with your clients.
Quick Tip:
Always think of your tint like sunglasses for your windows—they’re stylish, protective, and meant to last... if you treat them right.
So if you want to keep your ride cool, your home comfy, or your business polished, proper care is key. And don't worry—we’re walking you through every step, from the moment your tint is installed to years down the road.
First Few Days After Tinting – What to Expect
You just had your windows tinted—your car looks sharp, your home feels cooler, or your office has a new sleek edge. But before you go rolling down windows or scrubbing the glass, it’s important to understand what happens next: the curing process.
What Is Tint Curing?
When tint film is applied, a thin layer of moisture is used to help position the film perfectly before it adheres fully to the glass. That moisture needs time to dry out and bond completely. This is called curing, and it’s a normal (and crucial) part of the process.
Curing times vary depending on:
The type of tint film used (e.g., ceramic, dyed, or carbon),
The weather and temperature (heat and sun speed things up),
Whether the tint was applied to a vehicle or building glass.
For most situations:
Vehicles: 3 to 7 days
Residential & Commercial Windows: 7 to 10 days, sometimes longer in cooler or shaded conditions
What You Might See (And Why It’s Okay)
Don’t be alarmed if your windows look a little “off” at first. These are totally normal signs during the curing period:
Bubbles or Water Pockets: Small moisture bubbles between the film and glass are common. They will evaporate as the film sets.
Hazy or Milky Appearance: This foggy look is caused by trapped moisture and disappears as the tint cures.
Slight Ripple Effect: A little waviness can occur in the film during curing, especially in thicker or multi-layer tints.
Pro Tip from the SRS Team: If it looks like something’s not right—like large, expanding bubbles or peeling edges that don’t improve after 10 days—just give us a call. We stand by our work and are happy to inspect it.
First-Week Dos and Don’ts
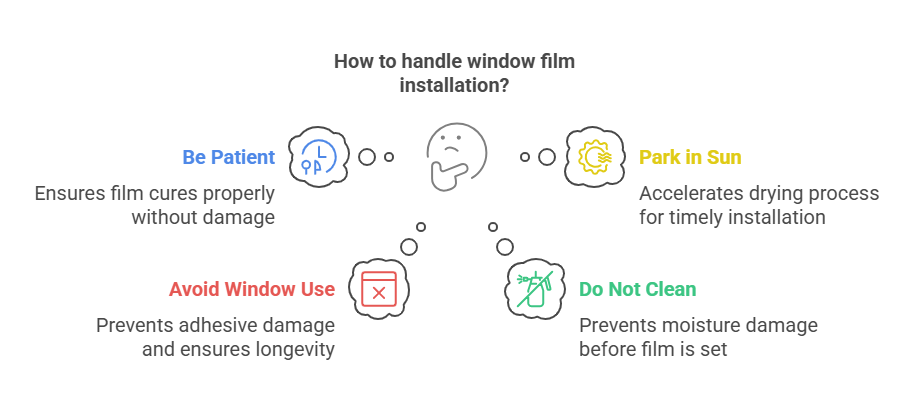
✔️ DO:
Be patient. Let the film cure before cleaning or touching it.
Park in the sun (when possible) to speed up the drying process.
Reach out if you have questions or notice issues after the first week.
❌ DON’T:
Roll down car windows for at least 3–5 days (even if you're tempted).
Press, poke, or peel at the film—this can break the adhesive bond.
Clean the glass during the curing period. Moisture and pressure can cause damage before the film is fully set.
Pro Tip: If your car’s freshly tinted and rain’s in the forecast, no worries. Rain on the outside doesn’t affect the curing—just keep the inside untouched.
Your tint is settling in, doing its job behind the scenes. Give it the time it needs, and you’ll be rewarded with windows that look sharp and perform like pros.
Cleaning Tinted Windows the Right Way
Let’s be honest—clean windows just feel better. But when your windows are tinted, you can’t treat them like ordinary glass. Using the wrong tools or cleaners can shorten the life of your film, leave scratches, or even cause peeling. The good news? Keeping your tinted windows spotless and damage-free is easy with the right approach.
At SRS Tint & Graphics, we’ve seen too many great tint jobs ruined by a quick wipe-down with the wrong cleaner. So let’s break it down—here’s everything you need to know to clean your tinted windows the right way.
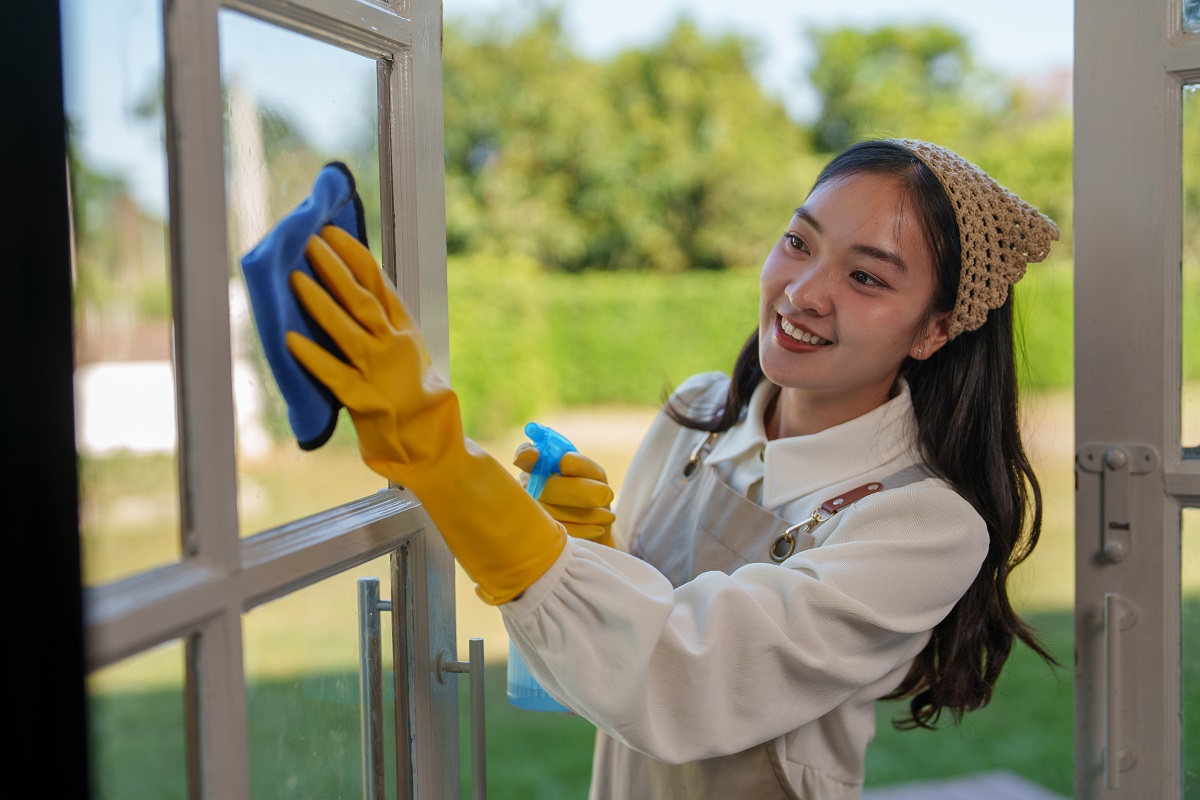
Step 1: Choose the Right Cleaner
The golden rule: No ammonia. Ever.
Ammonia-based cleaners (like many off-the-shelf window sprays) can eat away at the film, causing it to discolor, peel, or bubble over time. This is especially risky with dyed or carbon tints, but even high-end ceramic films don’t mix well with harsh chemicals.
Safe Cleaner Options:
Ammonia-free glass cleaners labeled “tint-safe”
DIY solution: Mix 1 part baby shampoo or mild dish soap with 4 parts water
Pre-mixed tint-safe sprays sold at auto parts stores or detailing shops
Pro Tip: If it smells like strong chemicals, skip it. If you wouldn’t wash your eyeglasses with it, don’t use it on your tint.
Step 2: Use the Right Tools
Rough cloths, paper towels, and scrub sponges are big no-nos. These can leave tiny scratches that dull your film over time—especially visible when sunlight hits the glass just right.
What to Use:
Microfiber cloths (your tint’s best friend)
Soft, clean sponges
Lint-free cotton towels
Always make sure your clothes are clean. Dirt or debris trapped in the fabric can scratch even the toughest film.
Step 3: Clean with Care
Be gentle. You’re not scrubbing a barbecue grill—you’re caring for a precision film designed to protect and enhance your space.
Cleaning Tips:
Spray your cleaner onto the cloth—not directly on the window—to avoid seeping into the edges.
Wipe in straight, horizontal or vertical motions instead of circles for a streak-free finish.
For vehicles, start with shaded areas and avoid cleaning hot windows, which can cause streaking.

How Often Should You Clean?
That depends on your environment. Here’s a quick guide:

If you live near the beach, drive on dusty roads, or get a lot of direct sun exposure—clean more often to keep your film looking fresh and clear.
What to Avoid at All Costs
Ammonia or vinegar-based cleaners
Abrasive pads or brushes
Squeegees with metal or hard plastic edges
Power washers near film edges (for exterior windows)
DIY razor blade scrapers
Final Tip from the SRS Crew:
“When in doubt, go soft, go simple. If your cleaner says ‘cut through grease’ or has warnings about ventilation—it’s too strong for your tint.”
Clean windows should look great without risking your tint investment. Stay tuned for our next section: Preventing Tint Damage – Everyday Tips to Keep Your Film Looking New.
Preventing Tint Damage – Everyday Tips to Keep Your Film Looking New
You’ve got your windows tinted, and they look fantastic—cooler, sleeker, and way more comfortable. But while tint film is designed to be durable, it’s not invincible. A few bad habits or accidental missteps can cause damage long before the film reaches the end of its lifespan.
The good news? A few simple adjustments to your daily routine can go a long way in keeping your tint looking flawless for the long haul.
For Vehicle Owners: Keep Your Ride Looking Fresh
Whether you're an auto enthusiast with ceramic tint or a busy parent hauling kids to soccer practice, your vehicle’s tint is constantly exposed to wear and tear.
Here’s what to watch for:
Rolling down windows too soon:
This is the #1 culprit for fresh tint damage. We recommend waiting at least 3–5 days before rolling them down—longer if it’s cool or rainy out.Kids, pets, and backpacks:
Tint is scratch-resistant, but not scratch-proof. Dog claws, seatbelt buckles, and even zippers can scuff or lift the film.Sun visors and suction cups:
GPS holders, dash cams, or decorations with suction cups can pull on the film or leave pressure marks over time.Automatic car washes with brushes:
Soft cloth or touchless washes are best. Avoid spinning brushes, especially if your tint is new or installed on exterior glass.
Pro Tip: Add a note on your car window buttons (like painter’s tape) that says “Do Not Roll Down” for the first week—especially helpful if you have passengers or a valet.
For Homeowners: Tint + Everyday Life
Home window tinting helps you save on energy bills, block UV rays, and protect your furniture—but it needs a little protection too.
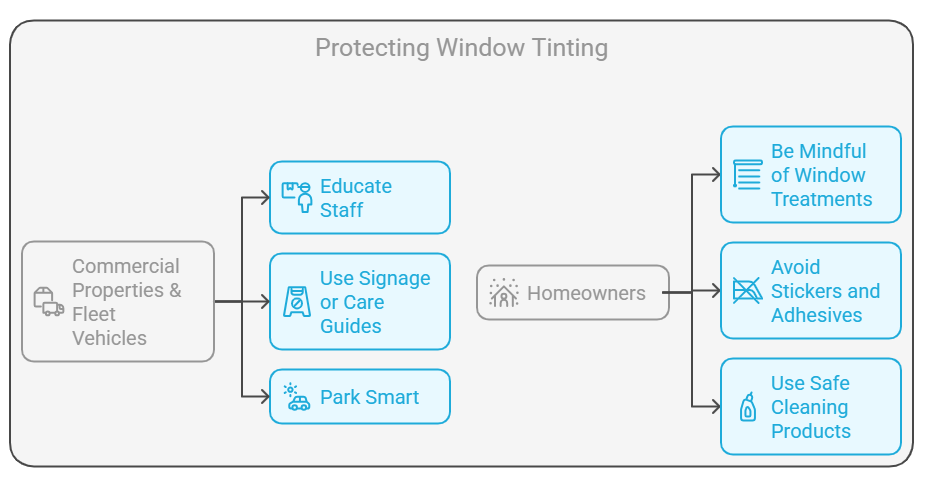
Be mindful of window treatments:
Heavy blinds or curtain rods that swing into the glass can scratch or loosen the edges of the film.Don’t apply stickers, decals, or tape to tinted windows:
Adhesives can damage the tint when removed and may cause discoloration.Avoid harsh cleaning crews or tools during house cleaning:
Let your cleaners know the windows are tinted and give them guidance on what products are safe to use (or leave them a bottle of tint-safe cleaner).
For Commercial Properties & Fleet Vehicles: Train for Tint Awareness
In businesses and fleet environments, tint damage often comes from well-meaning employees or vendors who simply don’t know better.
Inform your team or cleaning staff about the do’s and don’ts of tinted windows.
Use signage or laminated “care guides” in break rooms or inside fleet vehicles to prevent scratching, improper cleaning, or misuse.
Park smart:
Whenever possible, park or design buildings to reduce excessive sun exposure—over time, this preserves the integrity of the film and prevents premature wear.
Signs of Damage to Watch For
Not sure if something’s wrong? These are the most common red flags:
Peeling edges—can be caused by moisture, impact, or improper cleaning
Bubbles reappearing after curing—especially if they grow over time
Purple or faded tint—a sign of low-quality film or too much sun damage
Scratches or streaks that don’t wipe away
If you notice any of these, give us a call. At SRS, we back our work with top-tier materials and support—our lifetime warranty means you’re never left guessing.
Final SRS Tip:
“Treat your tint like a long-term investment—because it is. A little care now saves time, money, and hassle down the road.”
Long-Term Tint Maintenance – When to Clean, Inspect, and Re-Tint
High-quality window tint is built to last, but like anything exposed to the elements, it ages over time. From direct sun and fluctuating temperatures to everyday wear, your tint will eventually start to show signs of use. The key to long-lasting performance? Regular maintenance and a good eye for warning signs.
At SRS Tint & Graphics, we install durable, professional-grade films—but we also believe in setting you up for success after the install. Here’s what to know to keep your tint going strong for the long haul.
Routine Maintenance: Keep It Consistent
Whether it’s on your vehicle, storefront, or sunroom, window tint should be cleaned regularly using the tint-safe methods we covered earlier.
But beyond cleaning, you should also do a quick visual check every few months to spot potential issues early.
For Vehicles:
Check for signs of bubbling or peeling near window edges.
Look for scratches from seatbelt flicks, pets, or frequent rolling up/down.
Examine rear windows with defrosters—those lines can get hot and stress older tint over time.
For Homes & Commercial Spaces:
Inspect around the corners where film meets frame—this is where lifting often begins.
Check for fading or patchiness caused by prolonged sun exposure.
Review high-touch windows near doors or display areas for signs of wear.
SRS Tip: Set a calendar reminder to inspect your tint seasonally—spring and fall are great checkpoints, especially in regions with extreme summer or winter temps.
When Tint Starts to Break Down
Even the best tint doesn’t last forever. Over time, natural wear and exposure can lead to visible or functional issues that signal it’s time for a refresh.
Signs it’s time to re-tint:
Color shifting or fading: Purple or bronze tints are often a sign of older, degraded dye-based films.
Peeling edges or corners: This can let moisture in and weaken the adhesive.
Visible scratches or abrasions: These can reduce clarity and compromise the film’s performance.
Reduced performance: If you’re feeling more heat or seeing more glare, your film might be losing its UV and IR-blocking capabilities.
Re-Tinting: When & Why to Upgrade
When you start noticing those signs, don’t wait for it to get worse. Re-tinting gives your space or vehicle a fresh look—and better protection.
Reasons our customers choose to re-tint:
Upgrading to ceramic or nano-ceramic films for better heat rejection
Replacing low-grade film from DIY or outdated installs
Refreshing a vehicle or storefront before resale or rebranding
Improving privacy or aesthetics with a new shade or finish
And remember—if your original tint was installed by SRS, it may still be covered under warranty. We’re always happy to assess it and let you know your options.
Final SRS Tip:
“Think of your tint like tires or HVAC filters—set it, forget it for a while, but check in every few months to keep it running (and looking) its best.”
Troubleshooting – What’s Normal vs. What’s Not
We get it—when your windows don’t look exactly how you expected after tinting, it can feel a little unsettling. Maybe you see bubbles. Maybe there’s a strange haze. Maybe you’re wondering if it’s supposed to look like that.
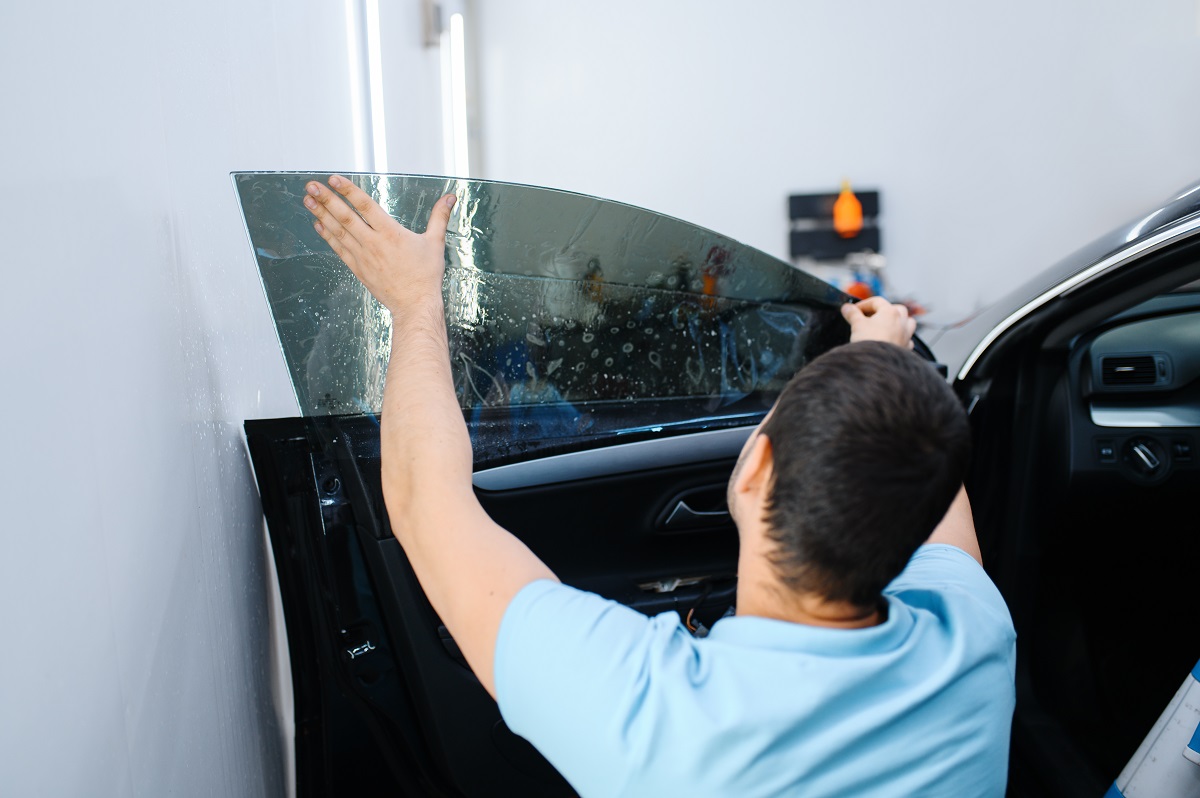
The truth? Some things are totally normal—and temporary. Others? Not so much.
This section will help you separate harmless quirks from actual problems—so you know when to relax and when to call us.
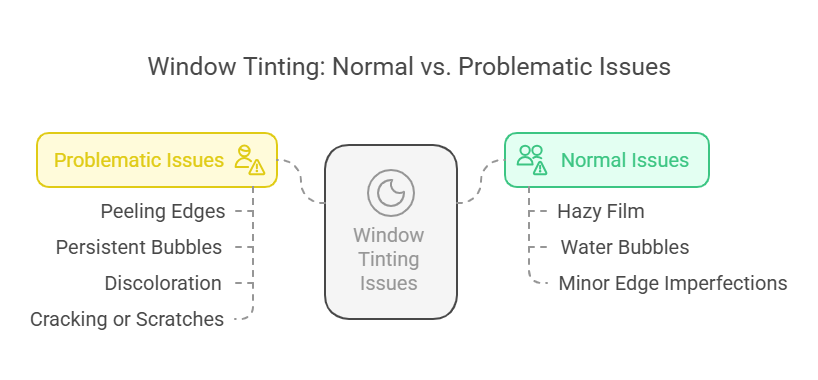
What’s Totally Normal (Especially in the First Few Days)
Let’s start with the good news: most “weird” things you see right after tinting are completely normal and part of the curing process.
Here’s what to expect:
Hazy or Foggy Film
Right after installation, tint may look a bit cloudy or milky. This is due to moisture trapped between the glass and film. It will clear up as the tint cures—typically within a few days to a couple of weeks depending on temperature and humidity.
Small Bubbles or Water Pockets
These aren’t air bubbles—they’re water bubbles. The film needs time for that moisture to evaporate. They’ll shrink and disappear on their own. If they’re still hanging around after 10–14 days, reach out and we’ll take a look.
Minor Edges That Aren’t “Perfect”
Fresh installs may have slight lifting or softness at the very edges as the adhesive bonds. These typically settle on their own. If it worsens, though, it may need resealing.
💡 SRS Tip: Try to resist the urge to poke, press, or “smooth out” these bubbles—this can actually damage the adhesive and make things worse.
What’s Not Normal (And Needs Attention)
If any of the following happen—especially after the curing period—it’s worth giving our team a call. These signs could indicate an issue with the film, installation, or even the environment.
Peeling or Lifting at the Edges
If corners are coming up or full edges are starting to peel away, that’s not part of normal wear—especially if it’s within the first year.
Large, Persistent Bubbles
Still seeing big bubbles after two weeks? That’s a sign the moisture didn’t escape properly—or worse, dust or debris was trapped underneath.
Purple Tint or Discoloration
This often happens with low-grade or dyed films exposed to prolonged UV. At SRS, we use high-performance films that resist fading, but if you’ve had older tint replaced or upgraded, this may be an issue with previous film quality.
Cracking, Scratches, or Hazy Spots That Don’t Wipe Off
These could be signs of damage—either from cleaning with the wrong materials, accidental abrasion, or tint that has aged past its lifespan.
What To Do If You Spot a Problem
Don’t panic—SRS has your back. Many issues are easily fixed if caught early.
Snap a photo of what you’re seeing.
Note how long it’s been since the tint was installed.
Reach out to our team—we’ll help you troubleshoot it or bring it in for a quick inspection.
With our professional-grade films and workmanship guarantees, you’re never stuck with tint that’s underperforming.
💬 Final SRS Tip:
“If it feels off, trust your gut—but also trust the process. We’re here to guide you every step of the way, and your peace of mind is part of the package.”
Why Professional Installation + Care Matter
There’s window tint… and then there’s professionally installed, high-performance window film backed by a crew that actually cares. The difference? Night and day.
In a world of DIY kits and one-size-fits-all tint jobs, it’s easy to underestimate how much professional installation and proper care can affect your results. But ask anyone who’s dealt with bubbling film, fading purple windows, or messy peeling—and they’ll tell you: it’s worth getting it done right the first time.
At SRS Tint & Graphics, we don’t just slap on film and call it a day. We customize, precision-install, and educate every customer so your tint looks better and lasts longer.
Why Installation Quality Makes All the Difference
Here’s what sets a professional tint job apart from a cut-rate or DIY one:
Perfect Fit & Precision Cuts
We custom-cut every film to match the exact dimensions of your windows. That means no awkward gaps, crooked edges, or trimming mishaps.
Dust-Free, Bubble-Free Application
We work in controlled environments and use advanced tools to eliminate air bubbles and debris during install. This ensures strong adhesion—and a crystal-clear finish.
Long-Lasting Bonding
Our install process gives the film a clean, secure edge that won’t lift or peel prematurely.
Premium Products
SRS uses high-performance films like ceramic and nano-ceramic options that outperform dyed or basic tints in heat rejection, UV protection, and durability.
Real Talk: That $50 DIY kit may look good for a month or two, but you’ll likely end up replacing it—and paying more in the long run.
Why Aftercare Support Sets SRS Apart
We’re not just in the business of installations—we’re in the business of relationships. Once your tint is applied, we’re still here to help you keep it looking great for years to come.
Our Promise to You:
Lifetime warranties on most tint products
Care instructions and cleaning tips provided after every install
Responsive support if you ever notice something off—we don’t disappear after install day
Inspections & touch-ups if you need adjustments or are unsure about wear and tear
Real Examples: Why Going Pro Pays Off
Fleet Manager: We helped a plumbing company rebrand with professionally wrapped and tinted vans that turned heads—and protected drivers from sun fatigue.
Homeowner: A family tired of skyrocketing AC bills got nano-ceramic tint on their sun-facing windows. Their home stayed cooler and their hardwood floors stopped fading.
Auto Enthusiast: A car lover came to us to replace faded purple tint from a previous shop. With SRS’s ceramic film, they not only boosted their car’s look but also its resale value.
💬 Final SRS Tip:
“Your tint isn’t just an add-on—it’s part of your space, your comfort, and your style. So don’t settle for average. With SRS, you get performance, precision, and people who care.”
Wrap-Up – Keep Your Tint Looking Sharp
Window tint is more than just a sleek upgrade—it’s a smart, lasting investment in comfort, style, and protection. Whether it’s keeping your car cool on a blazing summer drive, helping your storefront stand out, or cutting down on energy bills at home, your tint should work just as hard as you do.
And like any good investment, it performs best when you take care of it.

Here’s the recap:
Be patient during the curing process—a little haze or bubbling is normal at first.
Use the right tools and cleaners to keep your windows spotless without damaging the film.
Avoid daily wear-and-tear mistakes like rolling down windows too early or using suction cups.
Inspect regularly for signs of wear—and don’t wait too long to refresh or re-tint if needed.
Trust the pros—a great install and solid aftercare make all the difference.
At SRS Tint & Graphics, we’re proud to offer not just high-quality products, but high-quality people—installers, advisors, and support staff who are genuinely here to help. We treat every project like it’s our own, because we know how much your space, your vehicle, or your business means to you.
Ready to Get Started or Need a Tint Check-Up?
Whether you're:
Considering tint for the first time,
Noticing some wear and wondering if it's time to re-tint,
Or just want expert advice on maintenance—
We’re here for you.
Book a free consultation
Bring your vehicle or building by for an inspection
Ask us anything—we’ll shoot you straight, with no pressure
💬 Final Thought from Team SRS:
“We don’t just install tint—we stand behind it. Because at the end of the day, your satisfaction is the clearest thing we protect.”
Keep Your Tint Looking Its Best with SRS
Whether you're protecting your ride, upgrading your workspace, or creating a more comfortable home, your window tint deserves expert care—and so do you.
At SRS Tint & Graphics, we’re here for every step of the journey:
Thinking about getting your windows tinted? We’ll walk you through your best options.
Noticed bubbling, fading, or wear? We’ll inspect and recommend solutions—no pressure.
Want long-term protection? We’ve got the tips, tools, and pro support to keep your tint looking sharp.
👉 Let’s protect your investment the right way.
Click below to schedule a free consultation, request a maintenance check-up, or just ask us a question. Our friendly team is here to help.


