DIY vs. Professional Tint Maintenance | Pros & Cons Guide
Table Of Content
The Science Behind Tint: Why Maintenance Even Matters
Tint Maintenance Basics (Everyone Should Know These)
DIY Tint Maintenance: The Good, the Bad, and the Ugly
Is Professional Tint Maintenance Worth It?
DIY vs Pro: How to Choose (Decision Matrix)
Quick Decision Guide: DIY or Pro?
Common Tint Care Mistakes & Myths (That Cost You)
Tint Maintenance Timeline: What to Do & When
When to Repair vs When to Replace
Window tint isn’t just about looks; it's your first line of defense against heat, glare, and UV damage. Whether it’s protecting your car’s interior, adding privacy to your home, or keeping your business cool and efficient, high-quality tint is an investment.
But here’s the catch: like any investment, it needs maintenance to stay effective.
Now comes the real question: do you handle that upkeep yourself, or call in a professional?
Maybe you’re a hands-on kind of person who loves DIY projects. Maybe you're a property manager trying to stretch a facilities budget. Or maybe you're just trying to avoid peeling, bubbling, or fading that turns a good tint into a bad look.
Either way, this guide is here to help.
We’ll break down the pros and cons of DIY vs. professional tint maintenance across automotive, residential, and commercial settings. From common mistakes to expert tips and to myth busting, you’ll walk away knowing exactly how to protect your tint and when it’s worth calling in the pros.
Ready to keep your tint looking sharp and lasting longer? Let’s get into it.
The Science Behind Tint: Why Maintenance Even Matters
The window tint might look like a thin film, but it's doing a big job. Whether on a car, office, storefront, or living room window, it works quietly in the background, blocking heat, cutting glare, protecting interiors, and adding privacy.
But here’s the thing: tint isn’t bulletproof.
It lives in a world of harsh sunlight, grime, fingerprints, dust storms, water spots, and daily wear and tear. And if you don’t care for it properly, that same tint that once made your ride or space look amazing… can start bubbling, peeling, or turning purple before its time.

So, why does maintenance matter?
Because even the best tint has limits, and smart upkeep stretches those limits as far as they’ll go.
What Tint Is Really Doing:
Blocking UV rays that fade fabrics, dashboards, and flooring
Reducing interior heat so your A/C works less and you stay more comfortable
Adding privacy so people can’t see into your car or home
Protecting glass from shattering, in some cases (security film)
That performance depends on two things:
The quality of the film, and
How well it’s maintained
Even the highest-grade ceramic tint can lose its clarity or peel if cleaned with the wrong solution. And a cheap dyed film can last longer than expected if you baby it.
Different Tint Types, Different Needs
Not all tint is the same, and different types require different care:

Neglect = Problems
Without regular cleaning and inspection, you risk:
Bubbling and edge peeling
Discoloration or haze
Reduced UV and heat-blocking power
Voiding warranty (especially with DIY damage)
So whether you’re riding around with a fresh tint or you’ve had it for a few years, maintenance is what keeps it doing its job.
Tint Maintenance Basics (Everyone Should Know These)
Whether you installed your tint last week or it's been on for years, the rules of maintenance are the same: treat it gently, clean it correctly, and check it regularly. You don’t have to be a tint expert, but skipping the basics is a fast track to bubbles, peeling edges, or hazy film.
Here’s what everyone should know.

The Critical Curing Period (a.k.a. Don’t Touch It Yet)
After your tint is installed, it needs time to bond fully to the glass. That bonding process is called curing, and how you treat it during this phase makes a huge difference.
Golden Rule:
Don’t roll down your windows, clean them, or touch the tint for at least 3–7 days.
In humid or cooler climates, it could take up to two weeks.
Avoid:
Rolling windows down (for cars)
Cleaning the film
Pressing, scratching, or wiping the surface
Panicking over hazy or “milky” appearance that’s normal during curing
Cleaning Tint the Right Way
Once your tint is fully cured, it’s time to think about regular care. The good news? It’s easy as long as you avoid the stuff that ruins it.
Safe Tools:
Soft microfiber cloths
Tint-safe spray (ammonia-free)
Distilled water (optional)
Spray bottles with light mist
Never Use:
Ammonia-based cleaners (like standard Windex)
Paper towels (they can scratch!)
Rough sponges or brushes
Alcohol or vinegar-based cleaners
If you're not sure if a cleaner is safe, test it on an inconspicuous edge or just go with a pre-labeled “tint-safe” cleaner from an auto or hardware store.
How Often Should You Clean It?
There’s no hard rule, but here’s a general guide:
Cars: Every 2–4 weeks, depending on use and exposure
Residential: Monthly or seasonally (especially after storms or pollen build-up)
Commercial: Monthly for visibility, especially storefronts or high-traffic areas
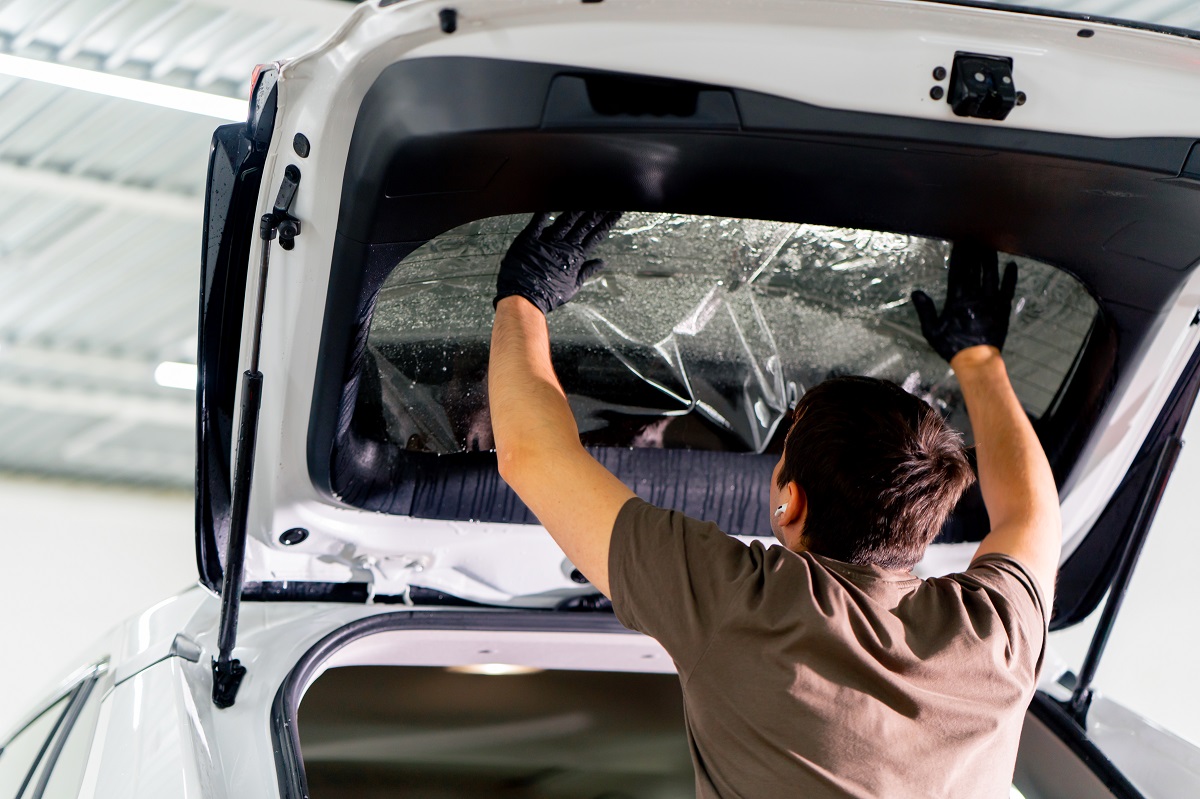
DIY Tint Maintenance: The Good, the Bad, and the Ugly
There’s something satisfying about doing it yourself. You save money, stay in control, and there’s a sense of pride that comes from handling your own maintenance, especially if you're the hands-on, detail-obsessed type.
But when it comes to window tint, DIY maintenance can be a bit of a mixed bag... One wrong cleaner or careless wipe, and you could end up shortening the life of your tint or voiding your warranty entirely.
Let’s break it down.

The Pros of DIY Tint Maintenance
1. Cost Savings
You don’t have to pay for regular professional visits. For many car owners and homeowners, a bottle of tint-safe spray and a good microfiber cloth does the trick.
2. Convenience & Control
No need to schedule an appointment. You clean when you want, how you want, perfect for those who like keeping things spotless.
3. Quick Fixes Between Deep Cleans
Spotted a few fingerprints or a dust layer? You can handle it on the spot, especially helpful for rideshare drivers, parents, or anyone constantly in and out of their vehicle.
The Cons of DIY Tint Maintenance
1. Easy to Get Wrong
Many DIYers grab the wrong cleaner with ammonia, alcohol, or harsh chemicals and unknowingly damage the film. Same goes for using paper towels or scrubbing too hard.
One careless clean can cause permanent scratches, hazing, or even peeling.
2. No Professional Inspection
You may miss early signs of trouble, tiny bubbles, edge lifting, or UV damage until it’s too late. A pro knows what to look for and when to step in.
3. Limited Tools & Techniques
Professional installers have specialized tools and know-how. DIY jobs might not reach all areas (especially large windows, corners, or tall storefront glass).
4. No Warranty Backup
Many professional installations come with warranties but those can be voided if damage occurs from improper DIY maintenance.
DIY Makes Sense If…
You’re using tint-safe products and following the basic rules
You’re maintaining a personal vehicle or small residential windows
You’re consistent and gentle with your care
Your tint is mid-grade or older, and you're not too worried about long-term perfection
But when the surface area gets bigger, the climate gets harsher, or the film gets fancier, DIY has its limits.
In the next section, we’ll explore when it’s smarter (and safer) to call in the pros.
Is Professional Tint Maintenance Worth It?
Hiring a pro might feel like overkill when it comes to cleaning or inspecting your tint, but sometimes, it’s the smartest (and most cost-effective) move in the long run.
Think of it like getting your oil changed. Sure, you could do it yourself… but is it worth the hassle, the risk, and the mess?
Let’s take a closer look at what professional tint maintenance really offers and when it makes sense to invest.
The Pros of Professional Maintenance
1. Expert Eyes = Early Detection
Professionals can spot signs of failure that most people miss like tiny stress cracks, bubbling along the edges, adhesive weakening, or early discoloration.
Catching issues early often means a simple repair, not a full reinstallation.

2. Pro-Grade Tools & Products
The tools used in professional maintenance aren’t just “better” ; they're specifically designed to clean and preserve high end films without causing damage.
This matters even more for:
Ceramic and multilayer tints
Decorative privacy films
Large commercial windows
Security films with impact-resistant layers
3. Warranty-Backed Protection
Many tint warranties require professional care or at least prohibit damage caused by improper cleaning. Let a pro handle it, and you keep your coverage intact.
4. Safe Repairs & Resealing
If something’s starting to peel or bubble, a pro can sometimes reseal edges or flatten bubbles without needing to replace the entire panel.
5. Peace of Mind
If you manage a fleet, own commercial property, or just want your vehicle to always look showroom-ready, this is one less thing to stress over.
The Cons of Professional Maintenance
1. Cost
No surprise here. Pro service comes with a price tag. But it’s often affordable as an annual or semi-annual check-in, especially compared to the cost of replacing damaged tint.
2. Scheduling & Availability
If you’re in a remote area or need last-minute help, pro service might not be immediate. It also requires a little planning and possibly time off for vehicle drop-off or on-site service.
3. Not Always Necessary
If you’re dealing with basic dyed tint or low-traffic windows and you’re confident in your DIY methods, professional maintenance may feel like overkill.
Professional Maintenance Makes Sense If…
You have high-end tint (ceramic, multi-layer, or specialty film)
You’re managing a fleet or commercial property
Your windows face harsh climates (sun, dust, coastal air, etc.)
You’ve noticed any tint issues bubbling, peeling, fading
You want to maximize warranty protection and tint longevity
You simply don’t want to risk it
In the next section, we’ll help you choose with a clear decision matrix for when DIY works, and when it’s better to bring in the pros.
DIY vs Pro: How to Choose (Decision Matrix)
So, DIY or professional? If you’ve made it this far, you know the answer isn’t one-size-fits-all.
It depends on what kind of tint you’re dealing with, where it’s installed, your budget, your tolerance for risk and how much time you’re willing to put into keeping it clean and damage-free.
This section gives you a simple way to decide. Use the checklist below to guide your next move.
Quick Decision Guide: DIY or Pro?
Not sure which route is best for your tint care? Use this guide to help you choose, based on your situation.
Is Your Tint New? (Less Than 30 Days)
Yes: Leave it alone your tint is still curing. No cleaning, rolling down windows, or touching the film.
No: You’re safe to begin maintenance, but use the right tools.
Recommendation:
Wait until fully cured before doing anything. This is when most early damage happens.
What Type of Tint Do You Have?
Dyed or Basic Tint: DIY is usually fine with gentle care. These are more affordable but fade faster.
Ceramic, Security, or Multilayer Tint: Higher-end films need more careful maintenance and may have warranty conditions.
Recommendation:
DIY is fine for basic tint. Hire a pro for premium or warrantied films.
Where Is the Tint Installed?
Car or Small Residential Windows: Easy to maintain with DIY just keep it clean and inspected.
Fleet Vehicles, Commercial or Large Windows: These take more wear, and mistakes are costly.
Recommendation:
DIY for personal use, pro for commercial or large-scale installs.
Are There Any Signs of Damage?
No Damage: Great! Stay on top of it with regular DIY care.
Yes (Bubbles, Peeling, Fading, Haze): These are warning signs that could escalate fast.
Recommendation:
Call a pro to prevent further damage or costly replacement.
How Confident Are You with Tint Care?
Very Confident: You know what products to use and how to clean gently? Go for it.
Not Sure: If you’re guessing or winging it, it’s not worth the risk.
Recommendation:
DIY only if you know what you’re doing. Otherwise, get expert help.
Do You Want to Keep Your Warranty Valid?
Yes: Many warranties require professional maintenance or exclude DIY damage.
Nope: If it's an old tint or wasn’t warrantied, you’ve got more freedom.
Recommendation:
Stick with pros if your warranty matters.
Do You Have the Right Tools?
Yes: Tint-safe cleaner, soft microfiber, no ammonia? You’re good.
No: Paper towels, Windex, or harsh scrubbing tools? Stop right there.
Recommendation:
Only DIY with proper gear. Otherwise, let a pro handle it.
At-a-Glance Decision Matrix

✅ = Recommended
⚠️ = Acceptable, but use caution
❌ = Not advised
— = Not necessary
Examples
Car owner in Phoenix, AZ
“My ceramic tint gets blasted by the sun every day.”
→ Pro inspection every 6–12 months recommendedHomeowner with privacy film in shaded area
“I use a microfiber cloth and water every few weeks.”
→ DIY is probably fineFleet manager noticing peeling on company vans
“We can’t afford bad branding or failed films.”
→ Pro maintenance + resealing ASAP
In short: DIY works, if you’re careful, consistent, and working with basic tint. But if you’ve invested in quality, rely on appearance, or spot issues? Bring in the experts.
Next up: let’s bust some myths and spotlight the most common mistakes people make when trying to care for tint.
Common Tint Care Mistakes & Myths (That Cost You)
You’ve got an awesome tint. But even the slickest tint jobs can go south fast if you treat them like regular glass. And let’s be real: the internet is full of bad advice. From YouTube hacks to cleaning shortcuts, we’ve seen it all.
Let’s unpack the most common tint care blunders and how to dodge them.
1. The “Windex Wipeout”
You’re standing there, bottle in hand, about to clean your windows like you always do. Spritz, wipe, done… right?
Not if your cleaner contains ammonia.
Ammonia is the silent killer of tint. It breaks down the film’s adhesive and can turn a clear, crisp tint job into a bubbled, streaky mess over time. That deep purple haze some people have on their windows? Often a Windex special.
Moral of the story: If it doesn’t say “tint-safe” on the label, it doesn’t belong on your glass.
2. Paper Towels Are Not Your Friend
They’re soft. They’re everywhere. They seem harmless.
But under a microscope, paper towels are basically tiny sandpaper sheets with lint built in. Every swipe leaves micro-scratches, which eventually dull your tint. Think of it like using a scouring pad on your sunglasses. No thanks.
Upgrade your gear: a soft microfiber cloth is your best friend. Bonus points if it’s clean, plush, and hasn’t been used to wipe down your dashboard full of grit.
3. The “Sunshine Scrub”
Here’s a common one: it’s sunny out, your car’s in the driveway, and you think, “Great time to clean my windows!”
Except... not really.
Cleaning hot glass is a recipe for streaks and damage. The heat evaporates your cleaner before you’ve even touched it, often leaving behind residue or worse baking chemicals into the film.
Instead, wait for shade. Morning or evening works best. Think of it like applying sunscreen after getting sunburned. Timing matters.
4. Treating All Tint the Same
Here’s where things get tricky.
Not all tint is created equal. Dyed film fades faster. Ceramic film is more durable. Security film is thicker and layered. Decorative film? Often more sensitive than it looks.
Using the same care routine for all of them is like washing silk with the same settings you use for denim. You can, but you’ll pay for it later.
If you’re unsure what kind of film you have, treat it gently and keep the cleaning simple until you know. Or a wild idea to call the folks who installed it.
5. DIY Tint Surgery (A.K.A. "I Got This")
We’ve seen it all: credit cards used as squeegees, hairdryers used to flatten bubbles, and tape used to “seal” peeling corners.
Look, we admire the hustle. But let’s not confuse TikTok fixes with long-term solutions.
DIY repairs often shove debris under the film, make bubbles worse, or trap moisture. What starts as a tiny issue becomes a full panel replacement. And in most cases? That “fix” voids your warranty.
If you see bubbling or peeling stop. That’s the part where a professional can actually help without making it worse. Let them do the heavy lifting (literally and figuratively).
6. The Silent Killer: Neglect
This one’s less dramatic, but just as damaging: doing nothing.
Your tint looks fine, so you figure it’s good to go. No cleaning, no inspection, no worries.
Until, suddenly, you notice fading. Or weird haze. Or peeling in the corners.
The issue? UV damage, heat stress, and time do their thing whether you're paying attention or not. Maintenance isn’t about fixing problems, it's about preventing them.
Think of it like dental floss. No one wants to do it. But doing it a little, consistently, saves you from pain (and big bills) later.
Up next, we’ll map out exactly what to do and a maintenance timeline that makes caring for your tint almost too easy.

Tint Maintenance Timeline: What to Do & When
You’ve got the knowledge. You’ve dodged the myths. Now it’s time to turn that into action because when it comes to window tint, timing really is everything.
Here’s your go-to roadmap for keeping tint in top shape whether it’s on your ride, your living room window, or your office storefront.
Week 1: Hands Off, Seriously
This is the curing phase the film is bonding to the glass, and it’s at its most vulnerable.
No cleaning, wiping, or touching the film
Don’t roll down car windows (tempting, but don’t)
Ignore light haze or bubbles they’ll likely vanish on their own
Let the film settle. This is when most early damage happens and it’s 100% preventable.
Weekly to Bi-Weekly (for Cars or High-Traffic Areas)
Once cured, light regular cleaning keeps your tint looking fresh and clear.
Do this if:
You drive daily in dusty or sunny conditions
You run a rideshare or fleet vehicle
You have commercial storefront windows that get fingerprints or grime
Your routine:
Wipe down with a microfiber cloth
Use a tint-safe spray as needed
Check edges for early signs of lift
Takes five minutes, saves five years.
Monthly (Home or Low-Use Areas)
For residential windows or cars parked in shade most of the day, you can ease up.
Your routine:
Clean with soft cloth and distilled water or tint-safe solution
Gently wipe around corners and edges
Look for fading or streaks that weren’t there last month
If it looks clean but feels gritty? Time for a deeper wipe-down.
Every 3 – 6 Months: Deep Clean & Inspect
This is your “tint checkup.” Just like rotating your tires or changing HVAC filters, it’s not glamorous but it matters.
Clean the full surface carefully, edge to edge
Inspect in daylight from multiple angles
Look for bubbling, fading, scratches, or hazy spots
Take a photo compare next time for any changes
Spot a problem? Consider scheduling a pro inspection
Bonus tip: add it to your seasonal to-do list (spring/fall). Easy to remember, easy to do.
Every 12 Months: Pro Check-In (Optional, but Smart)
Once a year, especially for high-end tint or large surface areas, consider letting a pro take a look.
Why?
They’ll catch invisible issues before they escalate
You’ll preserve warranty coverage (if applicable)
They might be able to reseal edges or treat early bubbling saving you from a full re-tint
It’s like getting your eyes checked even if everything seems fine, it’s good to know it is.
Instant Action Required If You Notice:
Bubbling that doesn’t go away
Peeling edges even tiny ones
Purple haze or fading
Scratches or “swirled” marks from improper cleaning
Sudden loss of heat rejection (you’ll feel it)
If any of that shows up, call a professional. Quick fixes now = fewer headaches later.
When to Repair vs When to Replace
No matter how well you maintain your tint, time, sunlight, and life eventually take a toll. The big question is: Can this be fixed… or is it time to start over?
Sometimes a quick repair keeps everything rolling. Other times? You’re better off cutting your losses and re-tinting the whole panel.
Let’s break it down.

Signs You Can Likely Repair
Small issues don’t always require a full do-over. In fact, catching problems early is the only way to avoid a complete reinstallation.
Here’s when a professional repair can save the day:
Minor bubbling near the edges
(especially if it hasn’t spread into the main surface yet)Tiny scratches or swirl marks
(often caused by improper wiping can sometimes be polished out or spot-treated)Lifting at corners
(if caught early, edges can be cleaned, re-adhered, and resealed)Hazy patches that come and go
(might be residue, not damage a deep clean may solve it)
Never try to re-stick lifted edges with tape, glue, or DIY methods. It won’t hold, and it’ll trap dirt which ruins any chance of repair.
Signs It’s Time to Replace
Some damage can’t be undone and attempting to “save it” will only lead to frustration (and a wasted service call). Here’s when a re-tint is the smart move:
Large or widespread bubbling
Bubbles across the whole window usually mean film failure not a surface issue.Color change or fading
Dyed films often turn purple or lose their tint entirely. That’s irreversible.Peeling that’s spread past the edge
Once the film starts peeling into the middle, it’s done. Water and debris are already underneath.Burnt or warped tint from excessive sun exposure
If it looks brittle, feels dry, or has warped in the heat replacement is the only fix.Film has exceeded its lifespan
Even high-end tints have a shelf life. Most films last 5 –10 years, depending on exposure, care, and quality. If yours is pushing the upper limit and acting up? Time to re-tint.
Not Sure Which It Is?
Here’s a rule of thumb:
If you’re asking, “Can I get another year out of this?” you’re probably already on borrowed time.
The best move? Get a pro’s opinion. Many companies (like SRS) offer consultations or quick assessments. A five-minute look could save you the cost of a full reinstallation or help you make peace with starting fresh.
Coming up: We’ll wrap up this guide with a down-to-earth summary and final tips to make sure your tint whether DIY or pro maintained gets the long, healthy life it deserves.
Do What Works, But Do Something
Tint doesn’t ask for much. It doesn’t beep, buzz, or send you annoying reminders. It just sits there, quietly blocking heat, UV rays, and curious eyes making your car, home, or business more comfortable and protected.
But that silent performance can lead to one big mistake: neglect.
Whether you go the DIY route or call in the pros, the key takeaway is this:
Maintenance matters.
Not because it’s complicated, but because it’s easy to overlook and the damage sneaks up fast.
Here’s the real talk:
You don’t need a pressure washer and a PhD to care for your tint.
You just need to clean it right, check it often, and fix small issues before they become big ones.
And if you're not sure what you're looking at? Ask someone who does.
DIY works great for routine cleaning and upkeep especially when you’re using tint-safe tools and paying attention to the details.
Professional maintenance is worth every penny when it comes to high end films, tricky damage, large installs, or protecting your warranty.
You don’t have to pick one or the other. Most of the time, it’s a mix:
DIY for the regular stuff
Pro help for the stuff you’re unsure about
And if your tint’s already bubbling, peeling, or fading? That’s not a failure that’s a sign it’s done its job. Now it’s your turn to return the favor.
What to Do Next
If you’re still not sure whether your tint needs a wipe-down, a touch-up, or a full redo you’re not alone.
Most people only notice something’s off after it’s already become a bigger (and more expensive) problem. That’s exactly why we put this guide together to help you make the call before it gets to that point.
So here’s your next step and no, it’s not a “book now or else” kind of thing.
If you’re the DIY type:
Stick a reminder in your phone to check your tint next month
Clean it right, and keep an eye on the edges
If you want a second opinion:
Call or message your local tint installer (or us, if you’re nearby)
Ask for a tint health check no pressure, just answers
If you’ve spotted a problem:
Don’t ignore it.
A quick repair might save you a full re-tint.
We’re not here to sell you something you don’t need. We’re here to protect what you already paid for.
Got questions? That’s what we’re here for.
We’ll give you straight answers, whether you’re driving a ceramic-coated show car or just trying to keep your office cool